
How to Use AeroPress to go Like a Champion?
The AeroPress Go is a portable coffee maker that has taken the world by storm. It’s known for its simplicity, durability, and the ability to brew a delicious cup of coffee wherever you go.
Whether you’re a coffee connoisseur or just looking for an easy way to make great coffee on the go, the AeroPress Go can help you brew like a champion.
In this article, we’ll walk you through the steps to use AeroPress Go effectively and get that perfect cup of coffee.
What You’ll Need
Before we dive into the brewing process, let’s make sure you have all the necessary equipment and ingredients:
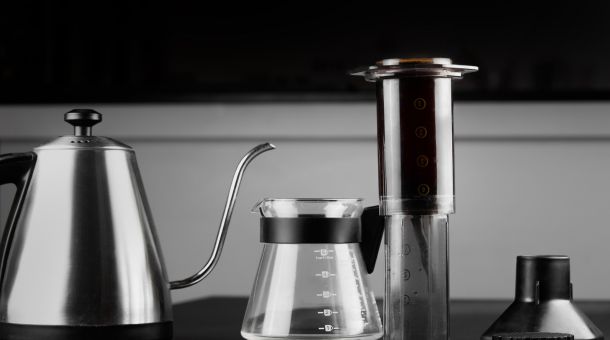
AeroPress Go:
Of course, you’ll need the AeroPress Go itself, which includes the plunger, chamber, filter cap, and stirrer.
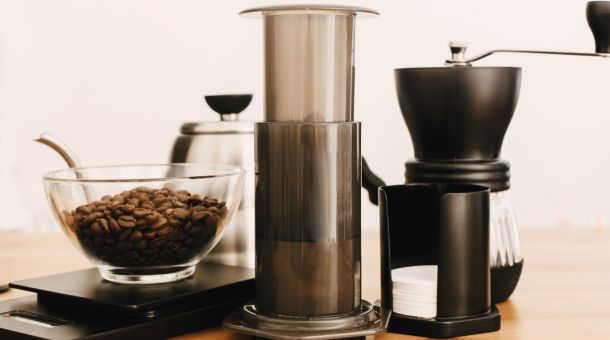
Fresh Coffee Beans:
Use high-quality, freshly roasted coffee beans. Ideally, grind them to a medium-fine consistency just before brewing.
Hot Water:
Boil water and let it cool for about 30 seconds. The recommended temperature is around 175°F (80°C).
AeroPress Filters:
You’ll need AeroPress-specific paper filters. Rinse them with hot water before using to remove any paper taste.
AeroPress Go Paddle or Spoon:
Though not included, having a paddle or spoon specifically designed for the AeroPress Go can be handy for stirring.
The Step-by-Step Process:
Step 1: Assemble Your AeroPress Go
- Start by placing a paper filter inside the filter cap and attach it to the chamber.
- Secure the chamber to the plunger. Make sure it’s snug, but don’t overtighten.
Step 2: Preheat and Prepare
- Rinse the AeroPress Go with hot water to preheat it. This helps maintain a stable brewing temperature.
- Dump the rinse water and place the AeroPress Go on your favorite coffee mug. This will serve as your brewing platform.
Step 3: Add Coffee Grounds
- Add the desired amount of coffee grounds to the chamber. A good starting point is one AeroPress scoop (about 14-17 grams) for a standard cup.
- Experiment with the coffee-to-water ratio to find your preferred strength.
Step 4: Add Hot Water
- Start your timer and pour hot water over the coffee grounds, ensuring even saturation.
- Use a circular motion to pour the water, covering all the grounds. Fill the chamber up to your desired level. A 1:15 coffee-to-water ratio is a good starting point.
Step 5: Stir and Bloom
- Use the AeroPress paddle or a spoon to gently stir the coffee-water mixture for about 10-15 seconds. This helps with even extraction.
- Let the coffee bloom for about 30 seconds. During this time, gases escape from the coffee grounds, allowing for a more flavorful brew.
Step 6: Attach the Plunger and Press
- Attach the plunger to the chamber and press down gently, applying steady pressure. Aim to finish the press in about 20-30 seconds.
- Stop pressing when you hear a hissing sound, indicating that all the liquid has been extracted.
Step 7: Serve and Enjoy
- Remove the AeroPress Go from your mug.
- Dilute your coffee with hot water or milk to your preferred strength.
- Clean the AeroPress Go by removing the filter cap and pushing the coffee puck into the trash.
Pro Tips for Champion-Level AeroPressing
- Experiment with Grind Size: Adjust the grind size of your coffee beans to find the sweet spot for your taste. Finer grinds usually result in a stronger brew, while coarser grinds are milder.
- Water Temperature: Pay attention to water temperature; it greatly affects extraction. Cooler water will give you a milder brew, while hotter water can make it bitter.
- Brew Time: Experiment with the brewing time. A longer brew time can extract more flavors but may also lead to over-extraction if not done right.
- Invert Brewing: Some users prefer the “inverted” AeroPress method, where you start with the plunger attached and flip the AeroPress Go after brewing. This can give you more control over steeping time.
- Use a Scale: For precise measurements, use a kitchen scale to weigh your coffee grounds and water.
With these tips and steps in mind, you’re ready to use your AeroPress Go like a champion and enjoy a delicious cup of coffee anytime, anywhere.
Conclusion:
using the AeroPress Go like a champion is all about mastering the art of simplicity and precision.
By following the steps outlined in this guide and experimenting with various variables, such as grind size, water temperature, and brew time, you can craft a cup of coffee that suits your exact taste preferences.
Whether you’re on a camping trip, at the office, or simply at home, the AeroPress Go is your trusty companion for consistently great coffee.
So, grab your AeroPress Go, some quality beans, and start brewing like a true coffee champion. Cheers to your next perfect cup of joe!
FAQ:
What is the AeroPress Go?
The AeroPress Go is a portable coffee maker designed for making excellent coffee while on the go.
It’s a compact version of the original AeroPress, perfect for travel, camping, or simply enjoying a quick and convenient cup of coffee at home.
Can I use any type of coffee with the AeroPress Go?
Yes, you can use any type of coffee beans with the AeroPress Go. However, for the best results, it’s recommended to use high-quality, freshly roasted beans and grind them to a medium-fine consistency just before brewing.
What’s the ideal water temperature for AeroPress brewing?
The recommended water temperature for AeroPress brewing is around 175°F (80°C). This temperature helps extract flavors without over-extracting, resulting in a well-balanced cup of coffee.
How much coffee should I use with the AeroPress Go?
A common starting point is one AeroPress scoop of coffee grounds, which is approximately 14-17 grams.
However, you can adjust the amount to your taste preferences. Experimentation is key to finding the perfect coffee-to-water ratio for you.
What’s the difference between the standard AeroPress method and the inverted method?
In the standard method, you place the AeroPress Go on a mug, add coffee and water, and then attach the plunger to press the coffee into the mug.
In the inverted method, you start with the plunger attached, add coffee and water, and then flip the AeroPress Go to brew.
How to Use AeroPress to go Like a Champion? How to Use AeroPress to go Like a Champion? How to Use AeroPress to go Like a Champion? How to Use AeroPress to go Like a Champion? How to Use AeroPress to go Like a Champion? How to Use AeroPress to go Like a Champion? How to Use AeroPress to go Like a Champion? How to Use AeroPress to go Like a Champion? How to Use AeroPress to go Like a Champion? How to Use AeroPress to go Like a Champion? How to Use AeroPress to go Like a Champion? How to Use AeroPress to go Like a Champion?